
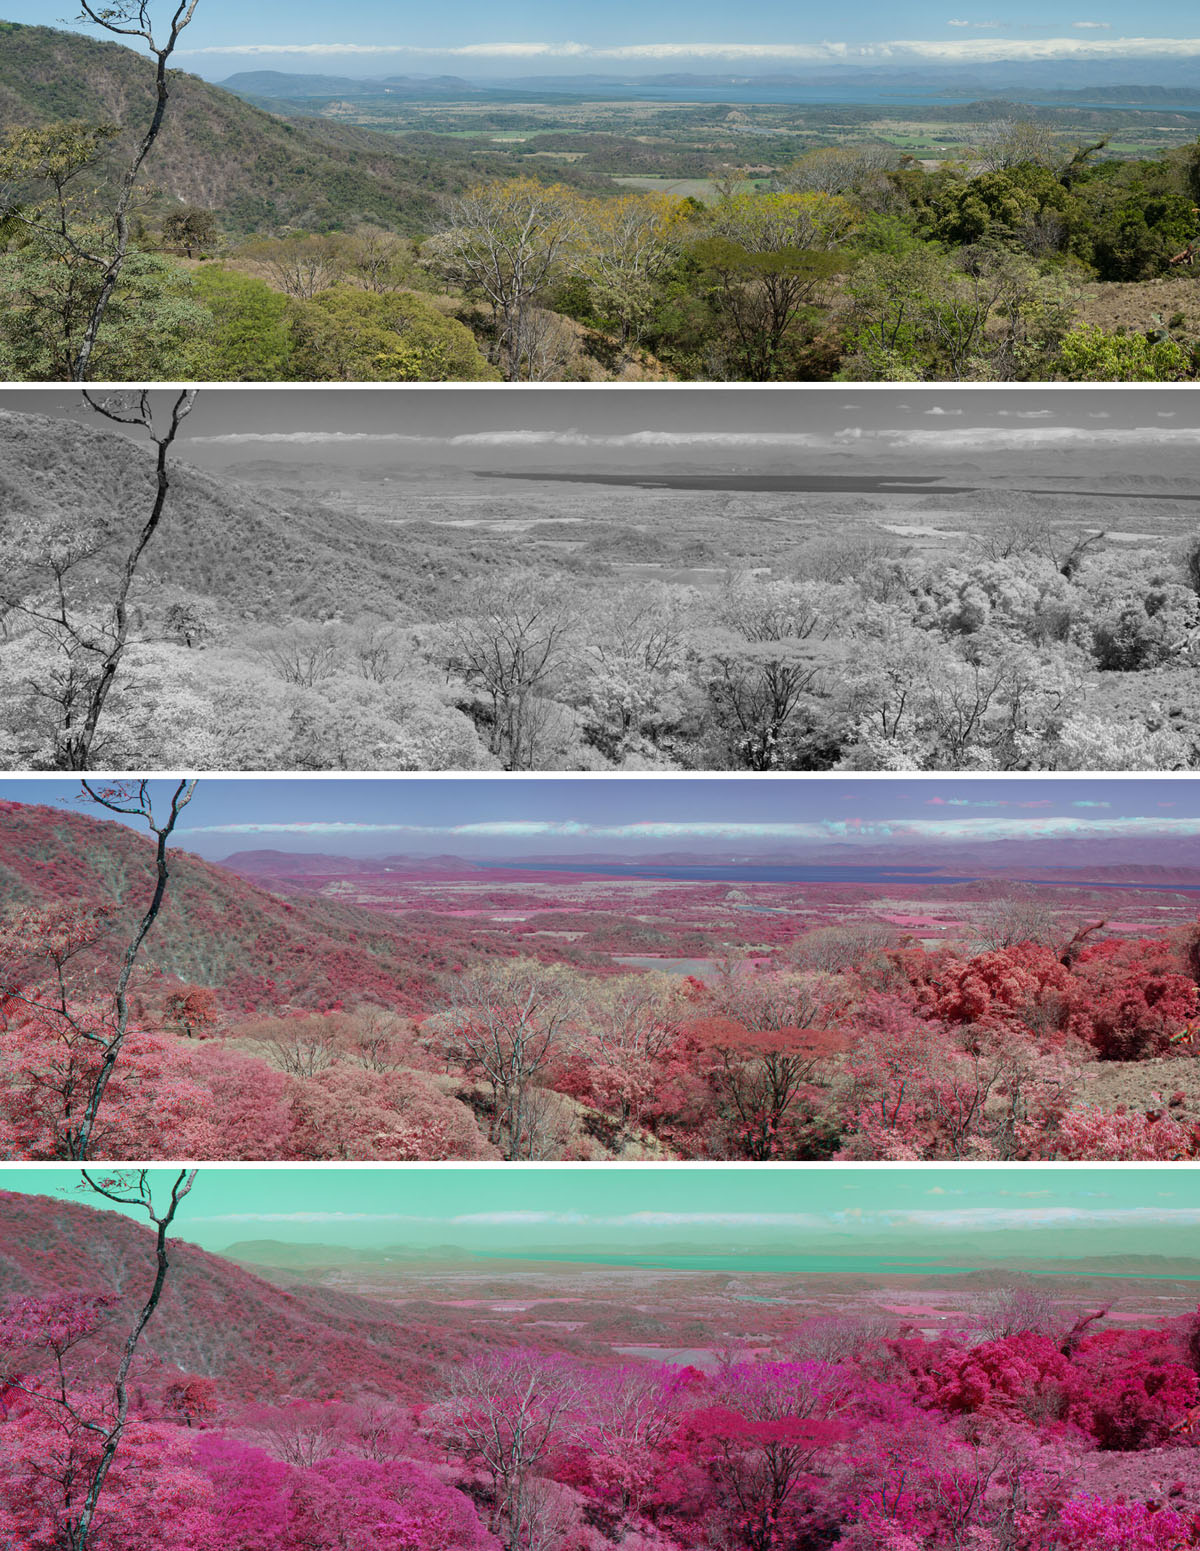
We’ve all seen those fantastic satellite images that show details of vegetation cover, water and other features in what scientists call false-color. Have you ever thought what they would look like if taken from the ground, just as a regular photo?
In order to better show vegetation and bodies of water satellite cameras look at light just outside of the red region of the spectrum. This region is the Near Infrared which I will call simply Infrared or IR. This is not the thermal IR we see in the movies but something more akin to simple red light, only it lies beyond our vision range. Remote sensing scientists then make photos incorporating the IR image into a regular RGB photo. The high reflectivity of green foliage to IR light makes plants very bright. Clear water does not reflect IR and then it looks very dark.
The drawback to adding the IR information to our perception of the world is that we cannot use this extra information to see new colors. Our vision system just doesn’t know how to do it. That is why engineers created false-color imagery in which they remap the IR information to the visible components of light.
So what do they do? The oldest technique, dating from the Landsat Satellite Program that started in the 1970’s, is to substitute the monocromatic infrared image for the red channel of the photo. Then they put the Red and the Green channels in the places of the Green and the Blue in order to produce an image in which vegetation looks bright red. Because clear water does not reflect the IR oceans and lakes look deep blue. This move is what I will call an IRG image to reflect the changes from a RGB normal photo. The letter I stands for the Infrared image in place of the R channel.
You can get an IR sensitive camera by sending a regular one to companies that will remove the IR-blocking filter incorporated in the sensor. However, if you own an old digital camera you might find that older digital cameras were very sensitive to the IR and can be used without modification.
I no longer own an older dSLR nor I have had my camera sent for Infrared conversion. However, I recently took a great Scientific Photography workshop taught by Art-examination expert Antonino Cosentino revived my interest in IR photography (check out his Cultural Heritage Science Site for lots of information). I dug out a few IR photos I had made with my Nikon D70 way back then and reworked them for this post.
For all these scenes I took a normal photo and then, without moving my tripod-mounted camera, a second one using a HOYA R 72 IR filter. For both I used aperture priority and only refocused a bit because lenses focus visible light and IR light differently. I did some exposure compensation in the IR photo to avoid overexposure of the red channel.
I took the IR mage into Photoshop and desaturated it completely using the Hue-Saturation-Brightness slider. Then I selected and copied from the visible light image the R and the G channels and pasted them into the G and B channels of the IR image, respectively. The result: classic false-color, IRG image.
I also tried creating a false-color image using the IR image as the R channel but swapping the G and the B channels. Now the vegetation looks magenta rather than red. We can designate this an IBG photo. You can create many different looks for your IR images by channel mixing or the usual hue-saturation adjustments.
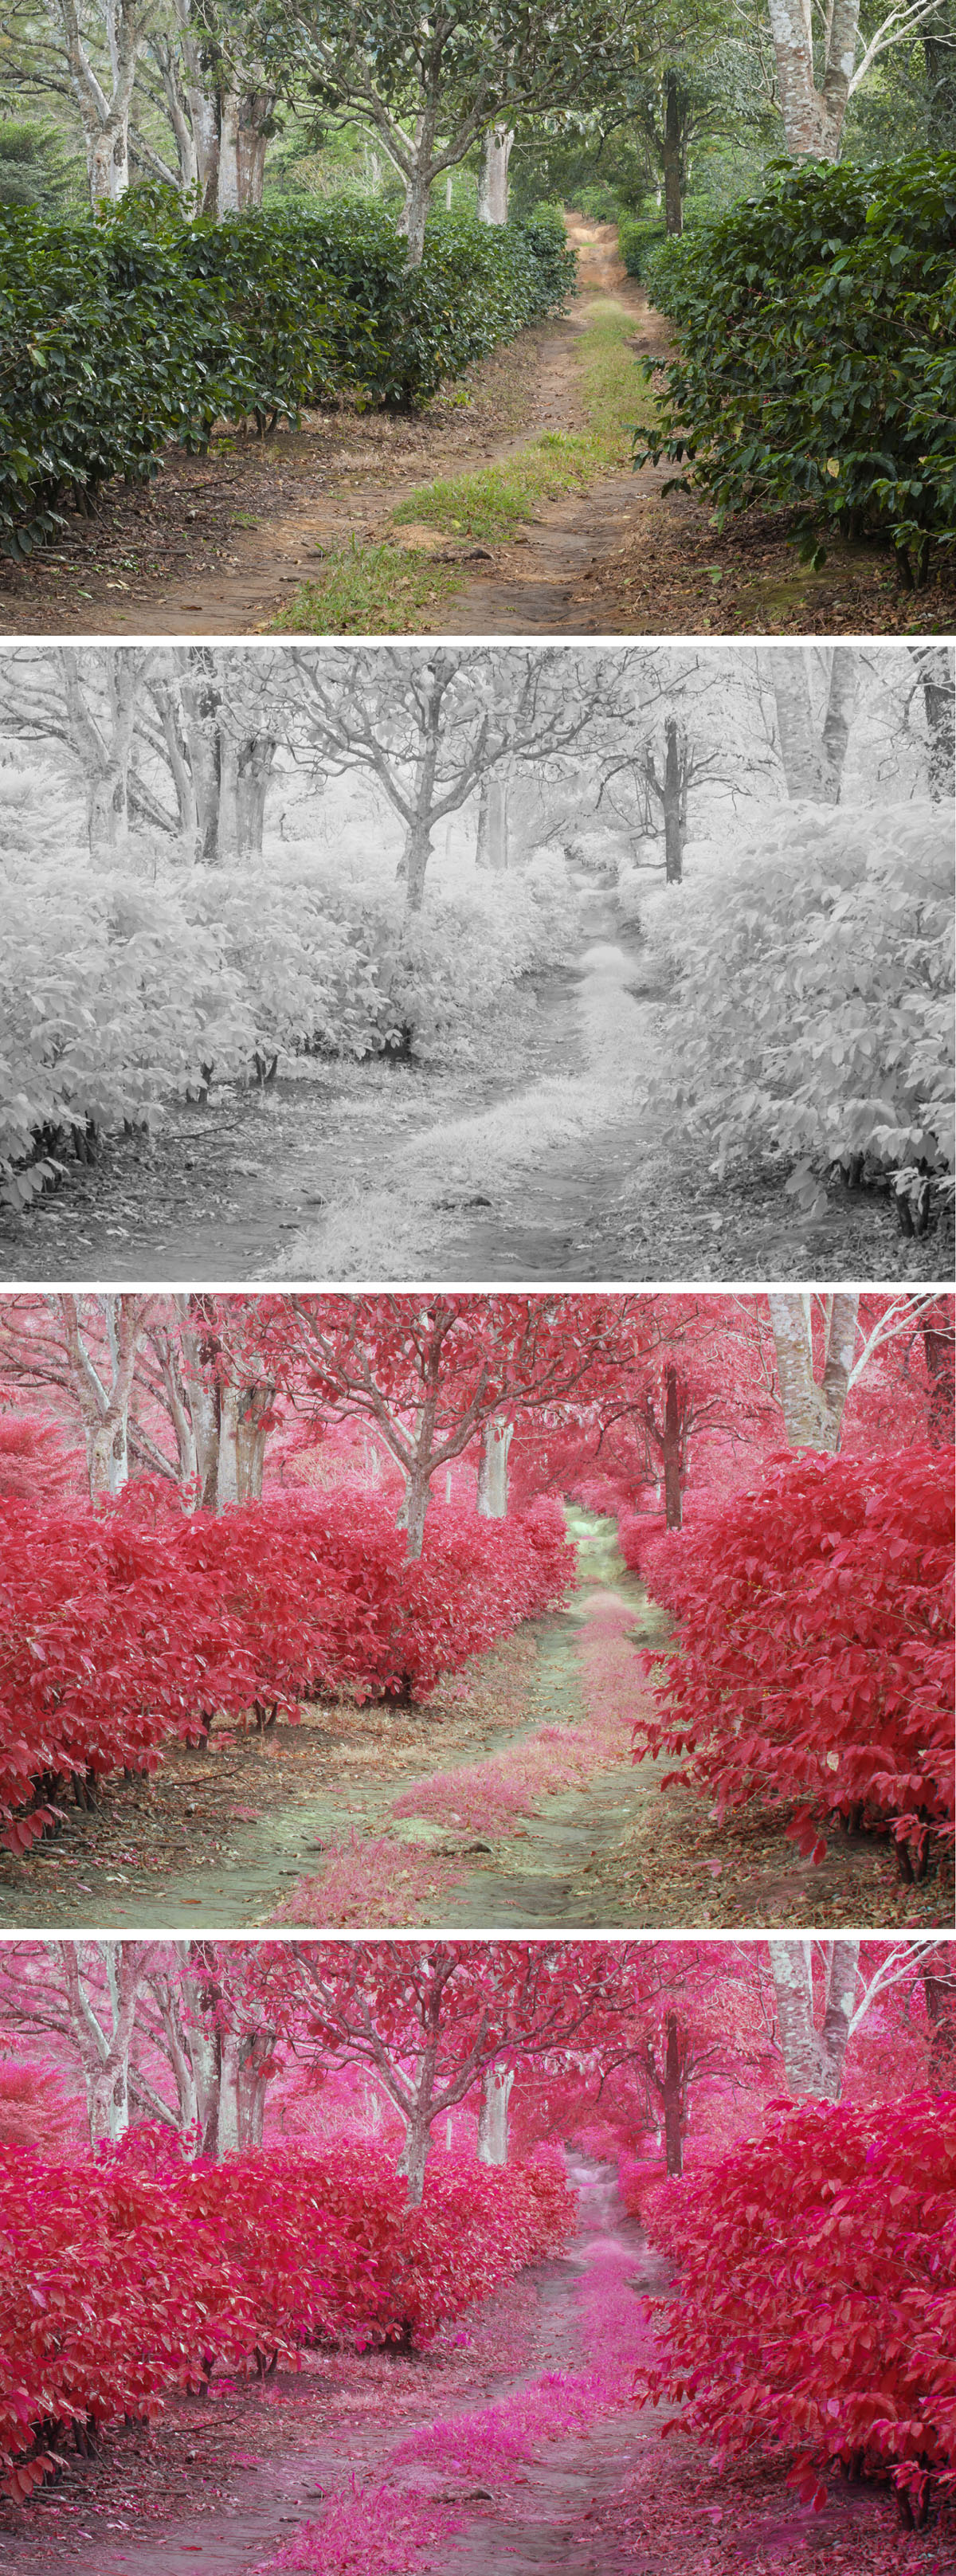
Ideally one should do the photos either simultaneously with an IR-sensitive camera and a normal one, or make sure leaves and clouds do not move in the picture or else it becomes impossible to get perfect registration.
I guess I now need my camera to get old quickly so I can have it converted for IR… Now, when is that Nikon D7800 coming out?

Reblogged this on From 1 Blogger 2 Another.
LikeLiked by 1 person
Thanks for the re blog! I am glad you liked it.
LikeLike
Eduardo, you are very welcome!
LikeLiked by 1 person